Thursday, March 22, 2012

Meet FourEyes

Say hello to our new little business, Foureyes.


"Sha-ha.....gyeah" (In my best Jay-Z impersonation)

We've started our own furniture design/building company. Custom furniture, made by hand, in America (more like our garage) using honesty quality materials, to your specifications, when you order it.  

(!!!)

I still can't believe I am FINALLY writing this post...I've been daydreaming of this for over a year, when Chris declared he was ready to put his woodworking skillz to the test. I remember that day...I promptly requested that he build me a bed...and a dresser...you know, the essentials. In the interim I've come up with several terrible wood puns, each of which was accompanied by the old one-two elbow and  "eh? ....eh?". But in all seriousness, we are officially in the furniture biz. Sure we're small potatoes, but if I may toot my own horn, I think we've got some good looking spuds here.

Enough with the chitter chatter. Lets get our foureyes on, shall we? 


Enter Silverfox. My favorite piece so far. I mean, just look at those gams. Awooga! Stretch out them legs and you've got yourself a dapper writing desk.


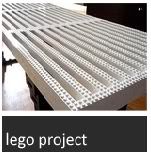
Next we have Welcmoe. Before you say anything, the product name is based on a silly family story that's been in rotation for as long as Chris can remember. It's one of those knee-slapper kind of stories which I will share, with full deets, in a future post.


Anywho, Welcmoe is part of our introductory line of tables. I like to say it's part DIY since you put it together yourself in less than 5 minutes. It has zero hardware (yay) and ships flat (yay squared). Not too shabby, eh?


Another favorite, Sevin -ST. Ok, they are all my favorite, but you know how they say a picture is worth a thousand words? Well, Sevin Side Table is worth a million words. So I'm a little biased. Roll with me.

Last but not least, I bring you my face.


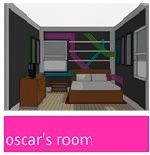
We call this, 'It's You'. Remember when I said I've been re-vamping our master bedroom. Well, besides painting the walls, the only thing we've done to the space is put up gigantic wooden faces of ourselves. But come on. Who doesn't want their face on their wall?! Custom wooden faces, big or small, can be yours. And I've got to admit, I think I look pretty good in wood.


I can't tell you how proud I am of Chris. Two years ago he knew zero about woodworking...and now he has his very own, homemade "box joint jig" for crying out loud...ok, I don't know if that's good or bad, I just remember it being a term he mentioned. But in all seriousness, what he has accomplished in a mere 2 years is phenomenal. Seriously. High five.

With that said, do me a solid and swing by our website to see the rest of our products. And if you're feeling a bit furniture happy, place an order, or two. 

Monday, February 13, 2012

Block Party

You've seen us play with LEGOs, so why not play with blocks? While it was tempting to recreate another iconic furniture piece, I decided to go towards more of a pocket size project. My inspiration came from Esty shop Olula whose geometric necklace made my mouth water.

                                                                                                   //via

And before I knew it, I was channeling the awesome Jenni of I Spy DIY and promptly hunted down my crimp pliers. Isn't she the best? (Um, yes!)  Ok, so now I was a girl on a mission. I veered towards the vat of wood scraps in the garage and dusted off a few lumber links and got to work. I mean, why not? Chris wasn't gonna use them all anyway. So, a table saw, drill press and one tenth of a sheet of sandpaper later, I was in the midst of a block party.


I found the biggest roll of gold string you have ever laid your DIY eyes on in my mom's garage several months back (I find the weirdest things there), and used the goldilocks ball to string in my blocks. I sandwiched crimp-beads to keep them cubies fixed as well as on each end of the toggle clasp to secure my novice knots.

As my first attempt, I replicated the geometric flags using my trusty 3M blue painter's tape. Within minutes, I had sharp clean flags all around.  Round two, I decided to add a fun twist and used letter stickers as a stencil. Slap on some leftover paint, remove the stickerinos and BOOM, a fun size interjection for your clavicles.


Not only was this DIY practically free of cost (high five!) but I now have a few fun accessories to wear in my everyday necklace rotation.


DIY Rating: Pretty neat.

Sunday, January 29, 2012

Are You There Blog? It's me, Dolores

Well, well, well. Look who came out of the woodwork.

I can't believe it's been over a year since my last post. A YEAR+! Egads! Totally unacceptable, right? Right.

I know what you're thinking..."where the hell have you been?" The truth of the matter is, there was oodles of internal work done to the house. Work that we would have been totally out of our element trying to do.  We paid the professionals to get the job done and although the work was superb, I didn't feel it was blog worthy. I figured, since it wasn't Chris and I doing the hustle and bustle, I would just let those deets slide until we began our next DIY project. But as luck would have it, we ended up exhausting our home improvement monies sooner than we thought. The joys of homeownership! It comes with the territory and I'm okay with that.  

To make a long story short, we (as in the professionals) upgraded our electrical system, had recessed lighting installed throughout the entire house, removed all the popcorn on the ceilings and re-textured them. In order to save a little money, we decided to paint the ceilings ourselves. Boy do we wish we could take that back! It.was.insane. My forearms hated me for an entire week. If I could ever take-back a DIY, painting 1700+ sq feet of ceiling space would be it, hands down. 

Soon after that we ran into some plumbing problems and before I knew it, we were faced with re-piping our entire house. Wah. Wah. Lucky for us, our neighbor two houses down is a commercial plumber, so we were in good hands. Since we were advised it was the perfect time to replace our water heater (you know start with a clean slate), we threw in the towel and went with a tankless water heater. Installing a tankless water heater was already on our long term list for obvious reasons, but the number 1 reason was the fact that our current water heater was in our kitchen tucked away into what 'would be' our pantry. Er, weird, right? See what I mean? We just had to do it. 

So there you have it. The short long version of our absence. We still have a few announcements to share (and no, I'm not pregnant) so stay tuned for some exciting stuff!

On another note, since this post became a pictureless post, I'll leave you with this;


I turned the big 3-0 this past summer. 


As I like to say, 30 is the new 21.